DID YOU SAY CHOCOLATE?
Irresistible


I have a recipe for Chocolate Oreo Cream Truffles that are so irresistible it’s not funny. My husband and son were just slightly too piggy because they wouldn’t stop eating them. They were sorry. Warning: Please limit your intake to two.
My adventure into making these sinful treats originated with the idea of making cake pops. You know, those adorable little cake-and-frosting balls perched on a stick, dipped in a glossy candy coating, looking all fancy schmancy? Yeah, that was my plan.
Reality? Not so much.
These were mine:
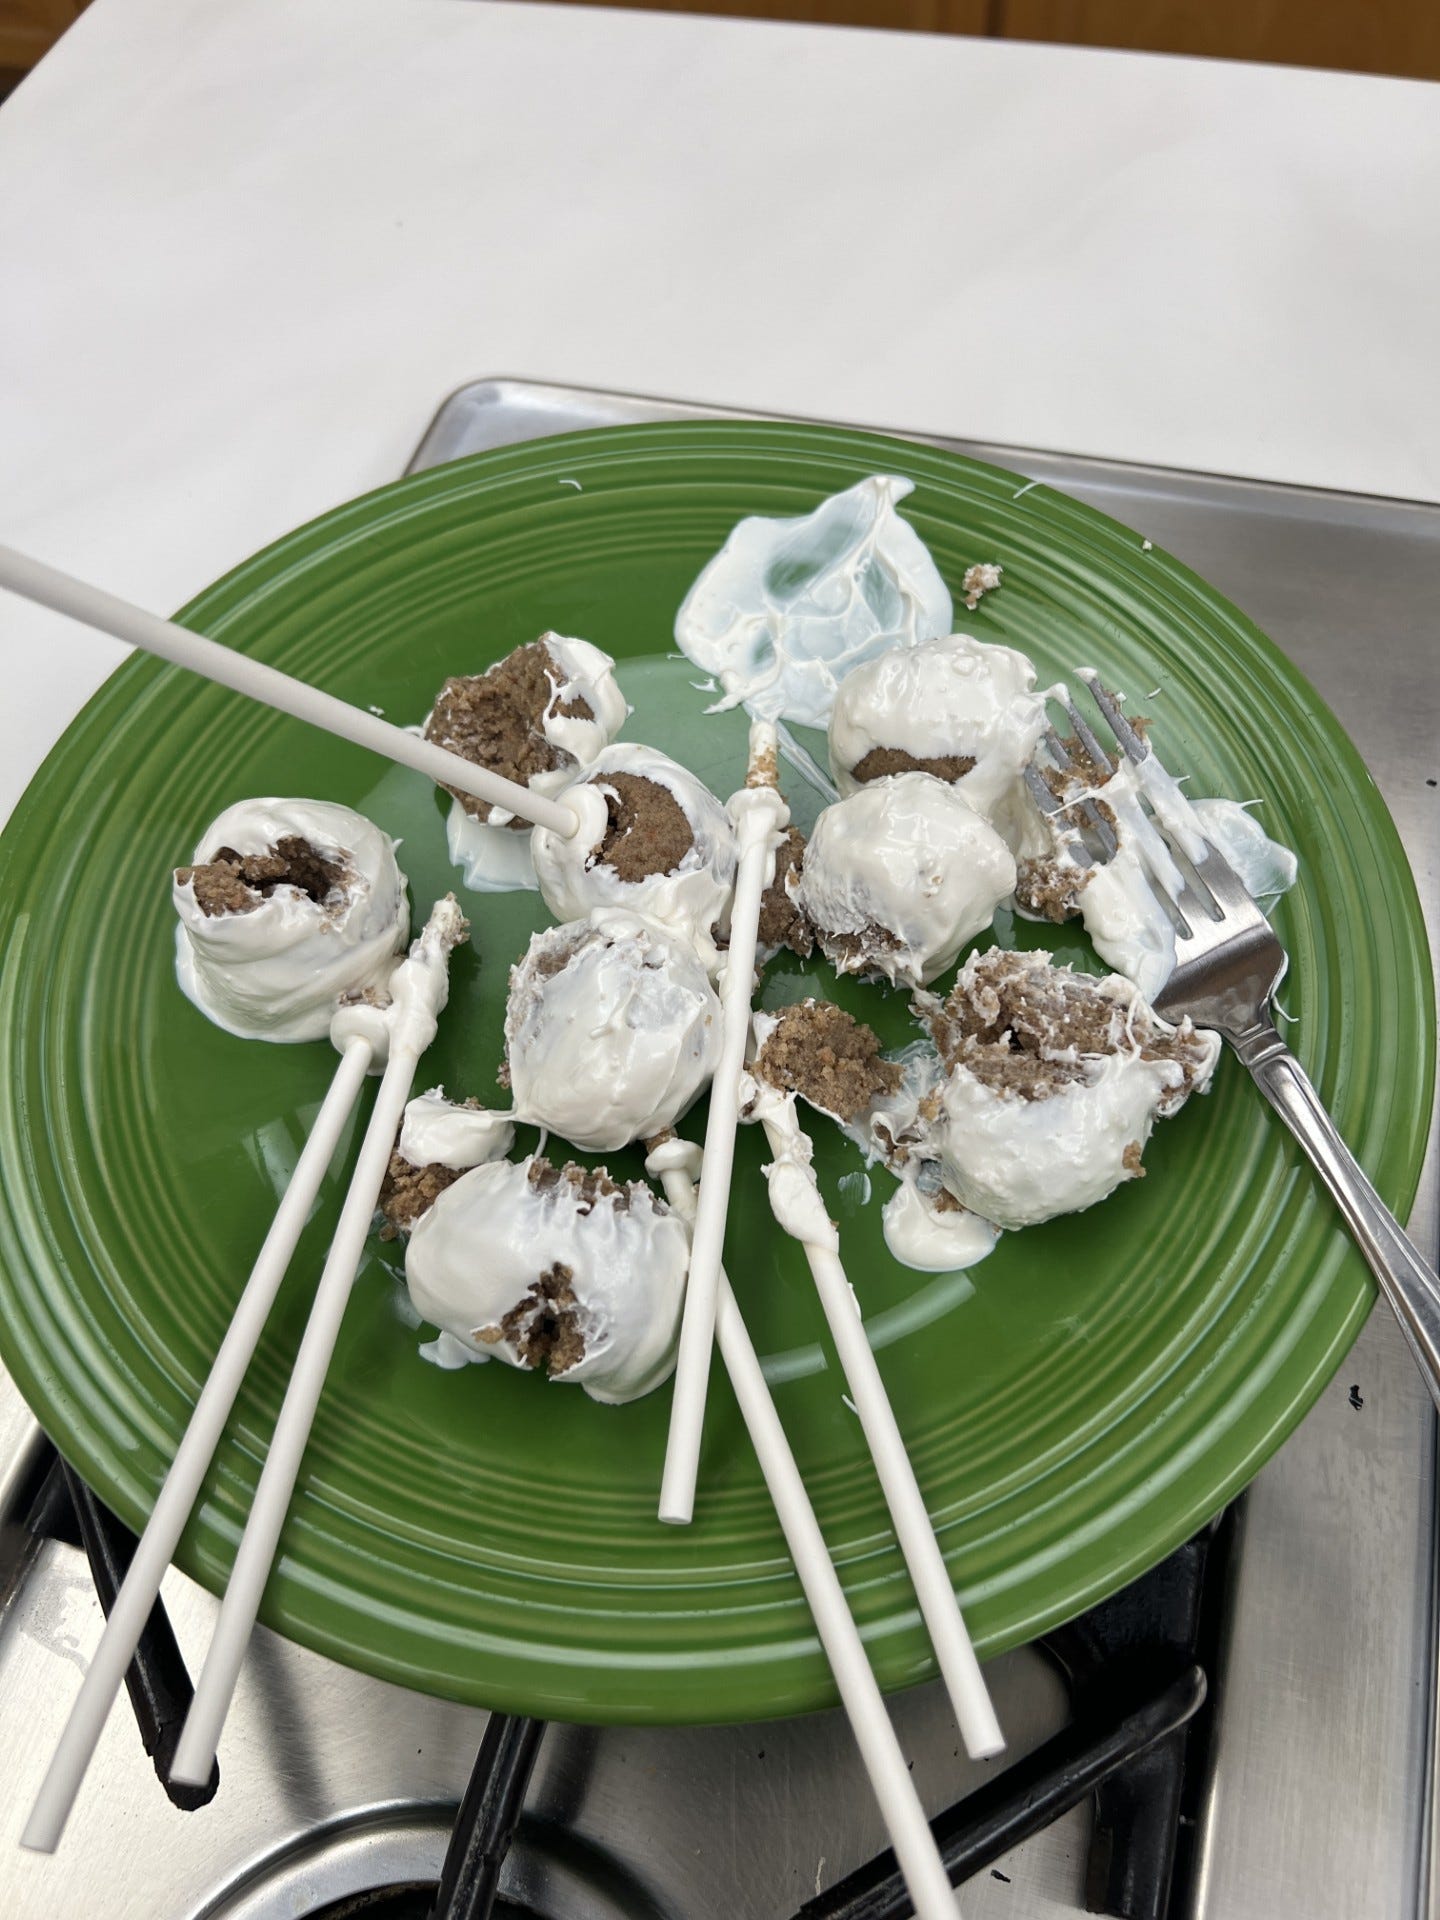
Clearly not acceptable. As you can see, the cake balls refused to stay on their sticks. No matter what I did, they’d slide, crumble, or just flat-out rebel. I tried every which way to get them to adhere but no luck. Well, they weren’t acceptable for company perhaps, but they tasted good to us! We ate them with forks and enjoyed every last crumb. No career for me in cake pops.
I went the cookie route for a couple of weeks, thumb-print cookies, chocolate chip, sugar, etc. While I was internet surfing recipes I found the Oreo Truffles. My heart raced and I began to salivate, literally. (Gross, I know).
Here’s the recipe:
Ingredients:
36 Oreo cookies (not Double-Stuf) One package
8 ounces full-fat brick cream cheese, soften to room temperature
12 ounces semi-sweet or white chocolate, coarsely chopped (NOTE: I used Ghiradelli dark chocolate flavored melting wafers, one 10oz package from Walmart)
1/2 teaspoon vegetable oil or coconut oil
Optional: sprinkles, melted chocolate, Oreo crumbs
Instructions:
Make the Oreo truffle filling: Place the Oreos (the entire cookie) in a food processor or blender. Pulse into a fine crumb consistency. (I put the cookies into a gallon freezer bag. Got out the rolling pin and went to work).
Using a hand-held or stand mixer fitted with a paddle attachment (or just continue using the food processor if it’s large enough), beat/pulse the Oreo crumbs with the softened cream cheese until combined.
Using a tablespoon, scoop out a spoonful of the mixture and, using your hands, roll into a ball. Place balls on baking sheets or plates lined with parchment paper.
If the mixture is too sticky to begin rolling the balls, place the mixture in your refrigerator for 15 minutes, then begin rolling. (This is important:) Place baking sheet(s) with Oreo balls into your refrigerator for at least one hour and up to 3 days! If you’re in a rush, cover and freeze the Oreo balls for 30 minutes, but no longer than that.
Melt the chocolate: Placed chopped chocolate and oil in a glass bowl or a 2-cup liquid measuring cup, its depth makes dipping easier. (I used the measuring cup method). Melt in 20-second increments in your microwave, stirring after each increment, until completely melted and smooth. You can also melt the chocolate using a double boiler, or a heatproof bowl placed over a pot of simmering water. Stir constantly. (I used the microwave. I began with 3 20-second increments and kept going with 10-second increments. you DON’T want to burn the chocolate, it turns into a hard mess). Let the chocolate sit for a couple minutes to slightly cool before dipping, otherwise, it will melt the shaped Oreo balls. Reheat chocolate when needed, in 10-second increments at a time.
Coat the Oreo balls, one ball at a time. Pierce with a toothpick and submerge each ball into the melted chocolate and swirl to coat; carefully lift out. (NOTE: I used individual toothpicks to dip and swirl, then placed each coated ball onto a parchment-lined baking sheet and removed the toothpick to allow the Oreo balls to dry).
Optional Garnishes: While the coated Oreo balls are still wet after dipping you can use any cake-decorating candies for garnish. (I used the mini multi-colored dots and tabs). Sprinkle the Oreo balls while on the sheet drying.
Refrigerate the Oreo balls for at least one hour to allow the chocolate crust to set. Once set you can (If there are any left after you stun your friends and neighbors with this chocolaty goodness!) store them in an airtight container in the refrigerator, layered with parchment paper or wax paper, for up to 2 weeks.
Notes: Rolling the Oreo balls will get messy. I wore thin plastic cooking gloves. Line at least three baking sheets with parchment/wax paper before you begin. Don’t use any chocolate but crushed bar chocolate or chocolate melting wafers. Do not use chocolate chips.
The first time I made these incredible creamy, chocolaty bon-bons they looked like this:
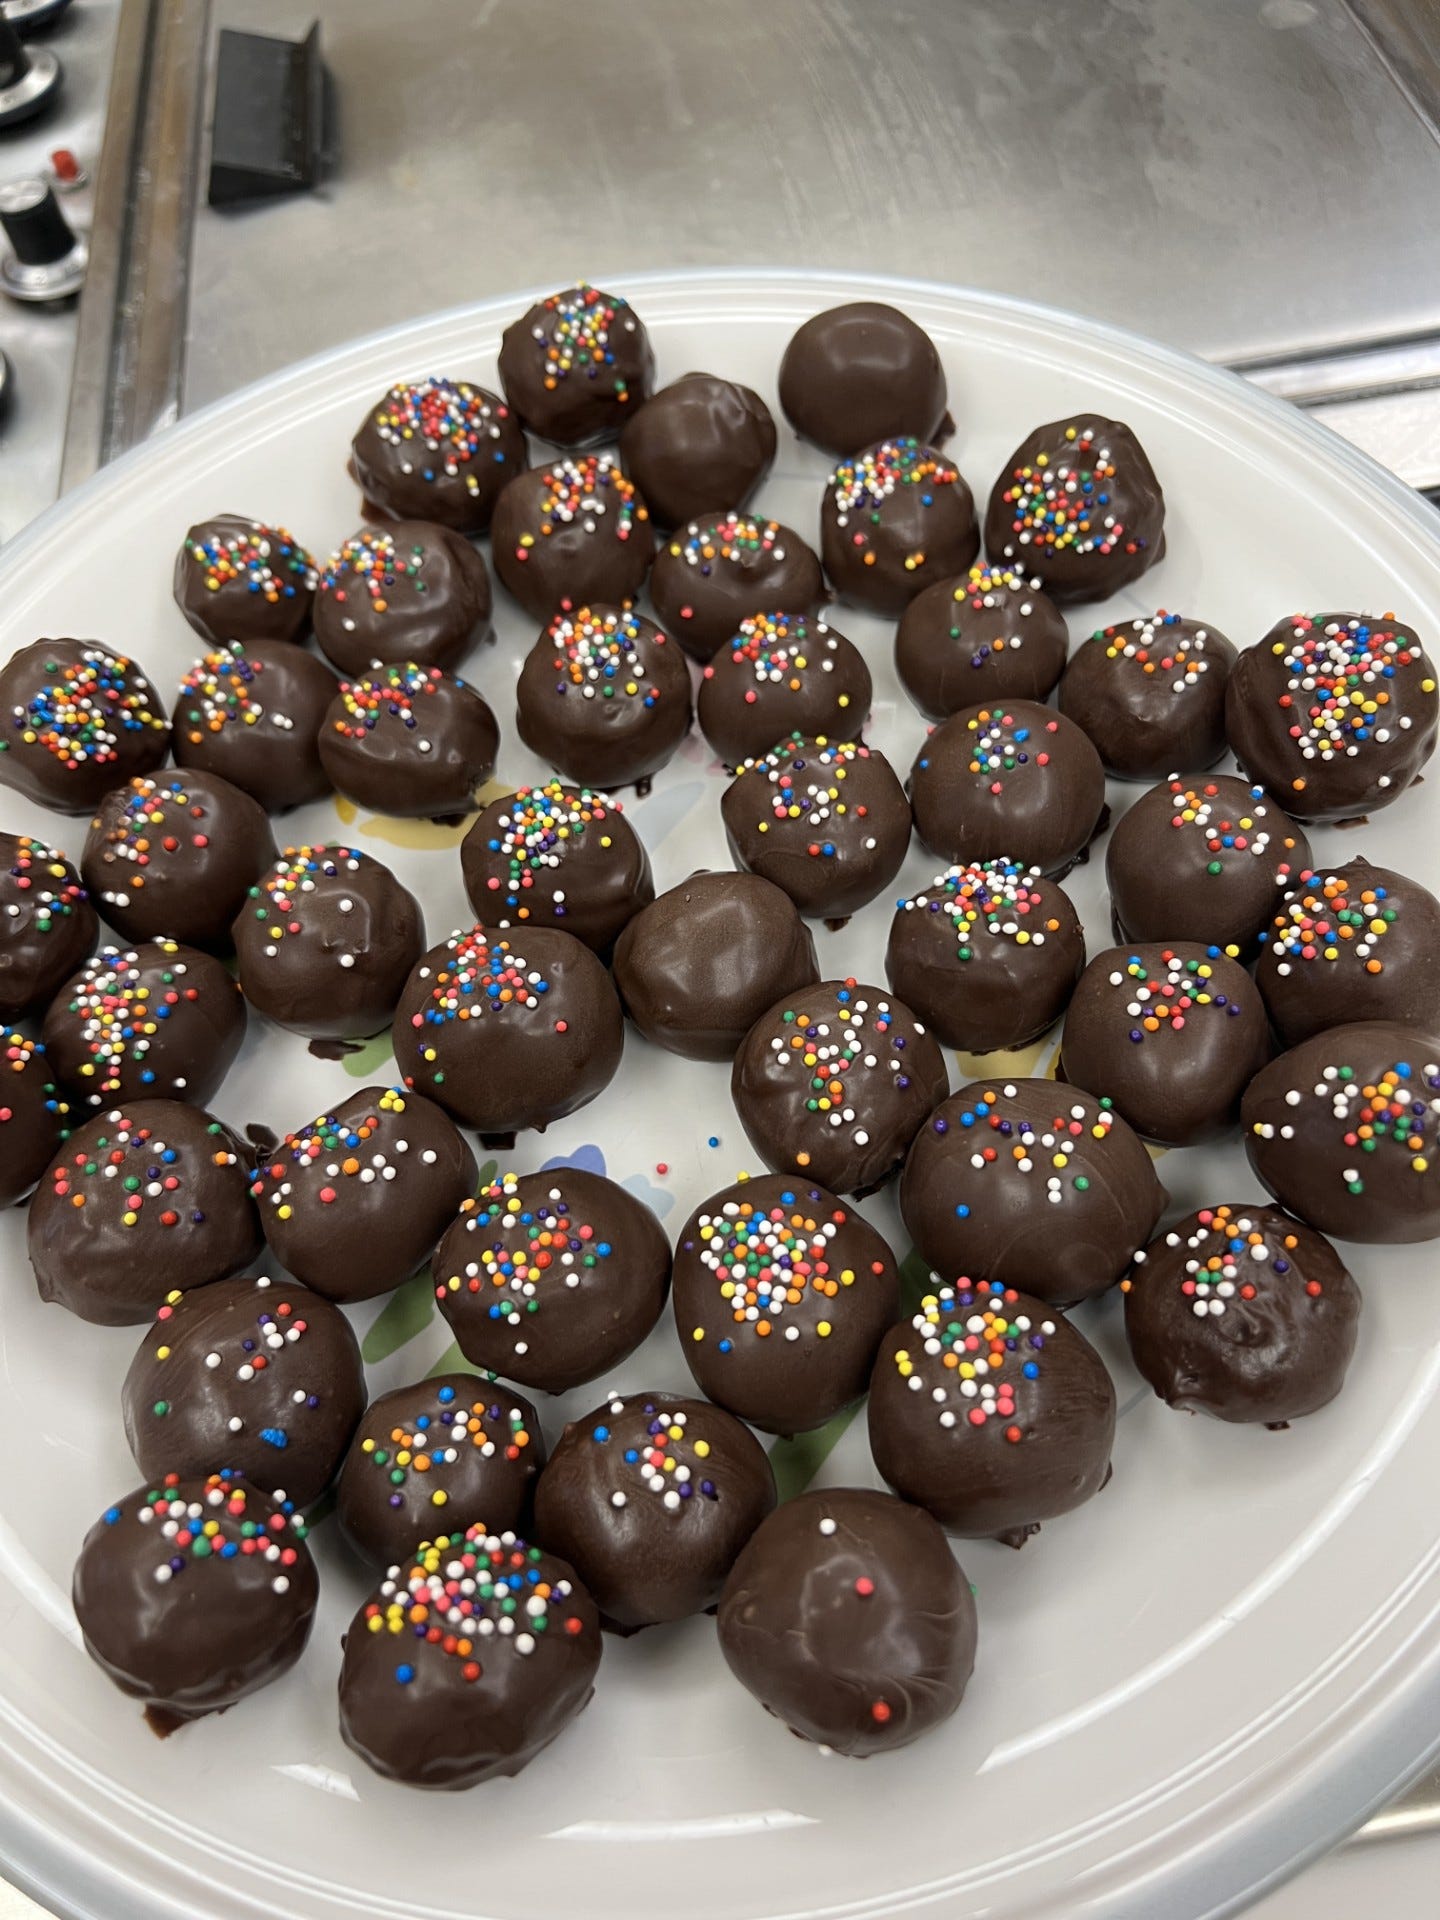
Not too shabby, right?
Put your apron on, grab your mixer and go! While mom always told me to “clean as you go”, that’s impossible in this situation. I say “eat as you clean”.
Enjoy.